Wednesday, September 18, 2019

Total-Body Tabata Circuit Workout Video with Kaisa Fit | Shape

Total-Body Tabata Circuit Workout Video with Kaisa Fit | Shape

The Total-Body Tabata Circuit Workout to Send Your Body Into Overdrive

Kaisa Body Shop Workout.mp4

In case you haven't gotten a taste of the workout magic that is Kaisa Keranen (@kaisafit), you're in for a real treat. Kaisa taught a class at the Shape Body Shop event in Los Angeles in June-which we streamed live on the Shape Facebook page. Here, you can join in for the entire workout, and it feels as if you're right there in that hot California sun.

ICYMI, you can catch Kaisa's 4-mintue Tabata workouts all over our site (just try this crazy push-up/plyo combo or our 30-day Tabata challenge)-including some seriously creative ones featuring unexpected household items, like this toilet paper Tabata workout or this on-the-go suitcase workout.

Warm-Up

Belly Breathing

A. Lie faceup on the floor in a comfortable position.

B. Inhale, blowing belly up like a balloon. Then exhale, pulling belly button toward the floor.

C. Repeat for 5 breaths.

Bridge

A. Lie faceup on the floor with feet planted and knees pointing up.

B. Press hips into the air to form a straight line from knees to shoulders. To make it more difficult, lift one leg into the air.

C. Hold for 10 seconds, then lower and lift hips 5 times. Switch sides; repeat.

Tabletop Plank to Downward Dog

A. Start in tabletop position with shoulders over wrists and hips over knees. Lift knees and engage core to hover knees off the floor.

B. Shift hips back and straighten legs to come into downward dog, body forming an upside down "V" shape.

C. Bend knees and drop hips to return to tabletop plank. Do 5 reps.

Mid-Back Rotation

A. Kneel on the floor, glutes resting on heels. Place the left hand on the floor in front of the left knee, and right hand behind head, elbow pointing out.

B. Rotate torso to touch right elbow to left elbow, then rotate chest open to the right, reaching right elbow toward the ceiling.

C. Do 5 reps. Switch sides, repeat.

WGW

A. Start in a high plank position. Step right foot forward to the outside of the right hand.

B. Lower left knee to the floor, then shift hips back, straightening right leg and shifting weight to right heel.

C. Shift forward, then back, gently rocking in the stretch. Do 10 reps. Switch sides repeat.

Squat with Reach

A. Stand with feet slightly wider than hip-width apart.

B. Shift hips back and bend knees to lower into a squat, then press into mid-foot to return to standing. Repeat for 30 seconds.

C. At the bottom of the squat, reach right hand toward left foot, then stand and reach arms overhead.

D. On the next squat, reach left hand toward right foot, then stand and reach arms overhead. Continue alternating for 30 seconds.

Lateral Reach

A. Stand with feet hip-width apart and hands on hips, knees slightly bent, and core engaged.

B. Reach right arm overhead and to the left, flexing torso laterally to the left.

C. Return to center, then repeat with the left arm. Do 5 reps per side.

Lateral Lunge with Reach

A. Stand with feet together and arms by sides.

B. Take a big step out to the right, bending right knee and sending hips back into a lateral lunge, reaching left hand to right toes.

C. Press off the right foot to return to starting position, and repeat on the opposite side. Continue alternating for 30 seconds.

Reverse Lunge with Reach

A. Stand with feet together and arms by sides.

B. Take a big step backward with the right leg, lowering into a lunge until front thigh is parallel to the floor, reaching left hand to right toes.

C. Press into the right foot to return to starting position, and repeat on the opposite side. Continue alternating for 30 seconds.

No-Hands Push-Up

A. Start in a high-plank position with feet hip-width apart. (To modify, drop knees to the ground to start.)

B. Bend elbows back at 45-degree angles to lower chest to the ground. Lift palms off the floor, extending arms forward.

C. Place palms flat on the floor under shoulders and press chest away from the floor to return to starting position. Repeat for 30 seconds.

Squat Jump

A. Stand with feet hip-width apart.

B. Sit hips back and bend knees to lower into a half squat, then jump, extending arms overhead.

C. Land softly, immediately lowering into the next squat. Hold this position for 5 seconds, then jump to begin the next rep. Repeat for 30 seconds.

Rest for 1 minute.

Strength Circuit

Reverse Lunge with Hurdle Kick

A. Stand with feet together. Step back with the right foot into a left leg lunge.

B. Circle right leg forward and around to lower back into left lunge. Repeat for 45 seconds. Switch sides; repeat.

Push-Up

A. Start in a high-plank position with feet hip-width apart. (To modify, drop knees to the ground to start.)

B. Bend elbows back at 45-degree angles to lower chest to elbow-level. Hold for 1 second, then press chest away from the floor to return to starting position. Repeat for 45 seconds.

Sumo Squat Punch Combo

A. Stand with feet wider than hip-width apart, toes pointed out.

B. Squat, lowering until thighs are parallel to the ground, then stand and pivot to the left, punching right fist under and up, as if hitting the bottom of a heavy bag (uppercut).

C. Squat, then stand and pivot to the right, punching left hand across body and shoulder height (cross). Repeat for 45 seconds.

Side Plank Toe Taps

A. Start in a side plank position on the left elbow with hips lifted.

B. Tap the right toes in front of left foot, then behind the left foot, without touching right left to left leg. Repeat for 30 seconds. Switch sides, repeat.

Do strength circuit 2 times.

Tabata Round 1

Giant Mountain Climbers to Balance

A. Start in a high plank position. Step right foot outside of right hand.

B. Jump and switch feet, right foot in plank position and left foot outside of left hand. Switch 2 more times.

C. Press into right foot and stand on right leg, driving left knee up in front of left hip to balance.

D. Place palms on the floor to the left of right foot and send left foot back into plank position. Repeat, jumping and switching 3 times, then balancing on the opposite side. Repeat for 20 seconds; rest for 10 seconds.

Lateral Bound to High Knee Shuffle

A. Stand with feet together. Jump far to the left, landing on left foot, then right foot.

B. Shuffle back to the right, driving knees up toward chest. Repeat for 20 seconds; rest for 10 seconds. Do every other round jumping the opposite direction.

Do this Tabata round 4 times. Rest for 2 minutes.

Tabata Round 2

High Knee Jog and Jump

A. Alternate driving knees up to chest. Repeat for 5 seconds.

B. Squat and jump, reaching hands overhead. Land softly, then go back to high knees. Repeat for 20 seconds; rest for 10 seconds.

Half Burpee

A. Start in a high plank position.

B. Hop feet forward to outsides of hands. Sink into a low squat, lifting arms overhead, biceps by ears.

C. Place palms on the floor between feet and hop feet back to high plank position. Repeat for 20 seconds; rest for 10 seconds.

Squat to Oblique Crunch

A. Stand with feet wider than hip-width apart, hands behind head with elbows pointing out.

B. Sit hips back and bend knees to lower into a squat.

C. Stand, driving right knee up toward chest and rotating torso to touch left elbow to right knee. Repeat, alternating sides, for 20 seconds; rest for 10 seconds.

Spider Plank

A. Start in a high plank position.

B. Draw right knee up to tap right elbow, hovering foot off the ground. Hold for 3 seconds, then return to high plank and repeat on the opposite side. Repeat for 20 seconds; rest for 10 seconds.

Do this Tabata round 2 times. Rest for 2 minutes, then follow Kaisa's cool-down stretching routine, or try these post-workout stretches.

  • By Lauren Mazzo


~A.

25 Herbs, Vegetables & Plants You Can Grow In Water

25 Herbs, Vegetables & Plants You Can Grow In Water

25 Herbs, Vegetables & Plants You Can Grow In Water

25 Herbs, Vegetables & Plants You Can Grow In Water

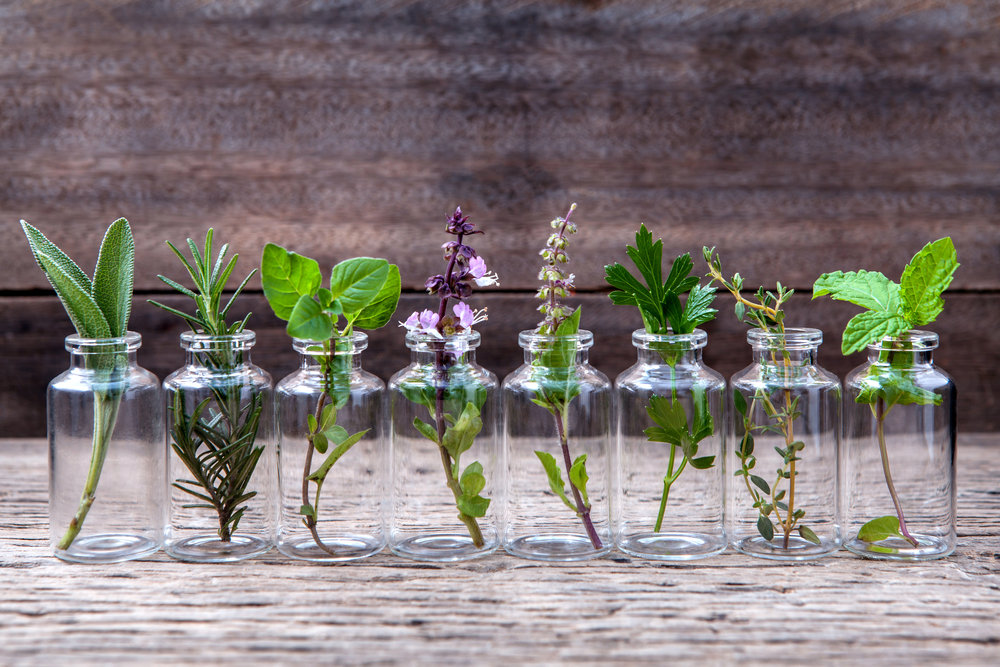
Do you have a few favorite "go-to" herbs? Why not grow them in water and keep them close at hand on the kitchen window sill or right on the counter? Water-grown herbs are just as flavorsome as those you grow in the garden. You don't have to mess with soil or worry about regular watering or changing seasons.

Most herbs will be happy growing in water, but those propagated from cuttings are easier to start in water. Seed-grown annuals like cilantro, mustard, and dill are a bit tricky because you need to sow the seeds in soil or some other medium and then transfer the seedlings to water. Soil to water transition is not impossible, but it may not always work out because soil-grown roots are a bit different from water roots.

What You Need to Grow Herbs in Water

Water

For a simple herb stand in the kitchen, you can root herb cuttings in plain water in glass bottles. Avoid using chlorinated water directly as the bleaching chemical is not exactly friendly to plant tissues. Tap water that has been left to air overnight is fine, so is stored rainwater. Spring water or well water is the best because it has some amount of dissolved minerals that may be of use to plants.

Containers

As for the container, mason jars or any other glass bottles will do, even plastic bottles. Roots generally like to grow away from light, so colored bottles, especially amber colored ones (such as these) are best. You can just wrap a piece of paper around the bottle to keep the root zone in the dark. This will even prevent algal growth on the container walls and on the root surface. Algae do not adversely affect plant growth, but they make the bottles look untidy.   

Narrow-mouthed containers have an advantage: they can support the cuttings and keep them nearly upright. However, the mouth of the container shouldn't be too narrow or tight-fitting around the cutting. The roots have to breathe, and the mouth of the container should allow free movement of air.

If you're using a wide-mouthed container, you have the option of covering the top with nylon or wire netting. Insert the cuttings through the holes, and that will offer some support to the cuttings. Another advantage, especially in warmer areas, is that the netting prevents mosquitoes from laying eggs in the water and multiplying.

Plant cuttings   

Soft cuttings are pretty quick to root in water. You don't need to use any rooting hormones. If you have some herbs growing in the garden, snip off 6-inch sections from growing tips and put them in the water-filled containers. The best part of growing herbs from cuttings is that you can use the ones you get from the supermarket. Just wash them in plain water and cut off the lower portion.

Remove lower leaves from cuttings and trim the lower tips close to the nodes from where the roots arise. When they are inserted into the bottles, there shouldn't be any leaves touching the water. They can rot easily and spoil the water, as they do in flower vases.  

Woody cuttings like rosemary may take longer to root, so be patient. Change the water once a week without disturbing the cuttings. Once the roots start growing, usually between 2-6 weeks, water changes may not be necessary.

If you have willow trees in the garden, you can steep some branches in warm water overnight to make a natural rooting hormone mix. Place the cuttings in the infusion to encourage rooting. Alternately, rooting hormone powder can be used.  

10 Best Herbs You Can Grow In Water

10 Delicious Herbs You Can Grow Indoors In WATER All Year Long

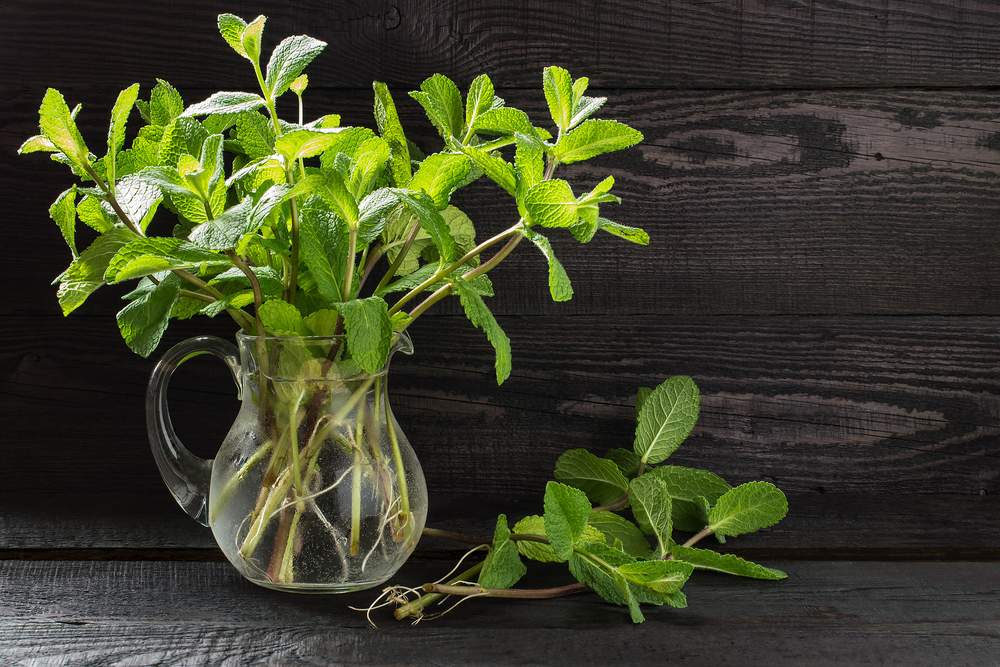
1. Peppermint – This is the most popular mint for medicinal uses because it contains high amounts of the volatile substance menthol. It gives a unique cooling sensation on the skin or tongue, but without actually causing any temperature variation. Growing peppermint in water is easy; just put fresh cuttings in water to grow new plants.

2. Spearmint – This is another mint variety closely related to peppermint. In fact, peppermint is a natural hybrid of spearmint and an aquatic mint that is commonly known as water mint.

3. Oregano – This pungent herb is worth growing indoors because you can use the leaves to flavor almost any vegetable. Take cuttings of fresh growth and pot them up in water. Start pinching the growing tips as soon as the plant starts to grow well.

4. Basil – Basil would love the warmth of your kitchen and grow happily in a water-filled container as long as you provide it good light. Take cuttings any time before it starts flowering. If you have several varieties of basil, growing cuttings in water is the best way to preserve your collection during winter.

5. Sage – Take soft cuttings in the spring and root them in water. You may need only one or two sage plants because only very tiny amounts are needed to impart flavor. Keep the plants in bright light and in a well-aerated place because this herb is prone to mildew.

6. Stevia – This sweet plant is good to have in the house to add to freshly brewed teas and beverages. Take cuttings of actively growing soft branches and place them in water. Provide a warm place and as much light as possible to keep this tropical plant happy and full of sweetness.

7. Lemon balm – The lemony scent of this mint-family herb is a welcome treat in any home, especially in the winter. The leaves are great for making tea. Take cuttings in spring or fall. Keep the containers in a warm place that receives plenty of bright indirect light. They may take up to 3-4 weeks to develop roots. Keep the water clean with regular changes. Some people find it easier to root the cuttings outside the house when the weather's still warm. It may help avoid white mildew that lemon balm is prone to. You can bring them indoors when the new plants are well established.

8. Tarragon – Take cuttings in the spring after new growth appears. Fall cuttings are fine too, but they may take longer to grow roots. Keep cuttings in a warm place that gets bright light. French tarragon is best as a culinary herb. Russian tarragon is milder, or even bland, so use it as a green in salads.

9. Thyme – You need to take cuttings of new growth that is green in color. The old growth that has become stiff and brown may not sprout roots easily. The best time to take the cuttings is mid-spring to early summer, before the plant starts flowering. The thin stems of thyme can dry out very fast, so put them in water as soon as you cut them. Spray the portion above the water, if necessary. Once it starts growing, cut the stems to promote branching.

10. Rosemary – The semi-woody cuttings of rosemary take longer to root, but spring cuttings of new shoots may be faster. Either way, it is worth the effort because rosemary makes an excellent indoor plant for a sunny spot.

9 Best Houseplants To Grow In Water

25 Herbs, Vegetables & Plants You Can Grow In Water

Not just herbs, but other houseplants do equally well in water. Just perfect for you if you regularly kill houseplants by over watering them or forgetting to water altogether. You don't need to make any special arrangements when you go off for a few days.

Pothos – This plant is commonly grown in water. Take tip cuttings of any length and put the cut end into some water making sure that 2-3 nodes are submerged in water.

Arrowhead –  This plant is similar to pothos. Tip cuttings can be potted up with a few nodes below the water level.

Philodendrons – Dainty heart-leaved philodendrons, as well as the large, split-leaved types do equally well in water. Take 6-8 inch cuttings of growing tips and put in a container that can support its weight. You may need to place a piece of rock in the container to prevent accidental tipping.  

Peace lily – You can pot up divisions or use an entire plant growing in a pot. Just wash off all the soil from the roots and put it in a bowl of water.

Aluminum plant – Cuttings of this beautiful plant with silver markings do very well in water.

Dracena – The plant commonly grown in water as Chinese lucky bamboo incidentally is no bamboo, but a variety of dracaena (Dracaena braunii). Others like corn plant (D. fragrans), Song of India (D. reflexa) are good choices. Sections of the cane can be rooted and grown in water, but support is essential for these top heavy plants.

Dieffenbachia (Dumb cane) – Cut top growth and pot up in water after the cut end becomes dry. Care must be taken while handling this plant; its sap is so caustic, it can burn your skin.

Chinese evergreen (Aglaonema) – Take cuttings or clean whole plants growing in pots and put them in large containers of water.

Chlorophytum (Spider plant, Airplane plant) – Put large plantlets or entire plants cleaned of all soil particles in goldfish bowls full of water. Water culture is best for hanging plants because you don't need to water them often.

6 Best Vegetables To Grow In Water

Watercress, water chestnut, wasabi, and lotus are some of the food plants that naturally grow in water. But many terrestrial vegetables can adapt to growing in water. Some, like leafy greens like lettuce and spinach, do extremely well. They seem to be happier than their counterparts growing in the ground because they get a continuous supply of water and are not bothered by soil pathogens.

Lettuce – This is the most favorite vegetable of hydroponic farmers. The easiest way to grow them hydroponically is to start the seeds in netted cups. When they are bigger, insert them into the beds containing growing medium.

Spinach – This leafy vegetable is grown the same way as lettuce.

Tomatoes – Tomato seeds started in individual cups are inserted into the growing medium. High yields are typical of hydroponically cultivated tomatoes.

Peppers – Their cultural requirements are similar to tomatoes.

Cucumbers – Bush type cucumbers are preferred for hydroponics; the climbing type would need extra support.

Celery – Being able to grow celery without soil is a bonus; it means no dirt deposited in the leaf bases. It makes cleaning the vegetable very easy.  

How To Feed Water-Grown Plants

Plants growing in plain water will soon exhaust what little mineral nutrients the water may contain. Since they don't have access to the nutrients naturally occurring in soil, they need supplemental nutrition to do well. Regular fertilizers diluted in water or proprietary formulations designed for hydroponics can be used at regular intervals.

When you use fertilizers to feed water grown plants, they leave some residues that may accumulate in the water and on the roots, causing root burn. Change the water at regular intervals and flush the plants and the containers occasionally.

Hydroponics – Growing Plants in Water and Inert Media

Soil has some functions other than providing minerals required for plant growth,. It supports the plants and provides a medium for anchoring the roots. When plants are grown without soil, the lack of proper support can be a limiting factor. Soil acts as a reservoir of water and fertilizers added to it, and then releases both in a controlled manner.  

Inert natural media like sand, gravel, perlite, vermiculite coconut fiber, and coconut chips are sometimes added to water containers to serve as support. Some products like lightweight expanded clay and rock wool are specially manufactured for this purpose.

Plants grown in a hydroponic medium seem to appreciate the physical support they get. Special nutrient formulations are mixed with water to provide continuous nourishment to the plants. That's why hydroponic systems typically give very high yield.  

Types of Hydroponic Systems

Wick system – The plants grow in tubs filled with an absorbent medium like coco-peat that can wick up nutrient-rich water from a bottom reservoir. It is somewhat like growing plants in soil, except that the nutrients come from the water, not the medium.

Deep Water Culture – It is almost same as the simple system described for growing plants directly in containers of water. The roots remain suspended in water, but the plants are actually growing in another container partially immersed in the main water container. Sometimes Styrofoam sheets with holes are used for suspending the plants.

The water in the main container is agitated or aerated with an aquarium pump. This extra aeration to the root zone helps reduce disease and keeps the roots healthy and strong. The main drawback is that power is required to run the system.  

Instead of allowing the roots to remain submerged in water all the time, different types of arrangements for intermittent exposure have been developed. This allows more air-circulation around the roots, helping reduce root zone diseases.  

Falling water – Nutrient solution is supplied to the beds from overhead sprinklers. It percolates down by gravity and gets recirculated. The root zone gets good air circulation, but the system involves pumping water for recirculation.

Flood and drain – The plants growing in the bed of inert medium are watered by intermittent flooding of the beds with the nutrient solution. The bed is them allowed to drain, exposing the roots to air.

Aeroponics

This is an improvement on hydroponics where growing medium is done away with. Plants are grown in holes cut into large pipes so that their roots remain inside the pipe. Nutrient solution is sprayed on to this root zone.   

Aquaponics

This is a combination of hydroponics and aquaculture in which fish and other aquatic life are grown. It does away with the proprietary nutrient solutions used in hydroponics, replacing it with the nutrient-rich water discarded from aquaculture tanks.

The system uses an inert medium that gets colonized by microorganisms capable of breaking down aquaculture waste products. The water thus cleaned and filtered by the hydroponic bed gets recirculated into the aquaculture tanks.

A simple replication of aquaponics would be growing herbs, watercress or microgreens on Styrofoam sheets floating in an aquarium tank with their roots absorbing the nutrients generated from fish waste.

It is truly amazing the number of plants that can be grown without soil.  If you are ready for a change from conventional gardening why not try your green thumb at water gardening?

Read Next: 20 Cut & Come Again Edibles For An Endless Supply Of Nutrient Dense Food


~A.

Sunday, September 15, 2019

25 Plants & Herbs You Can Propagate From Cuttings

25 Plants & Herbs You Can Propagate From Cuttings

25 Plants & Herbs You Can Propagate From Cuttings

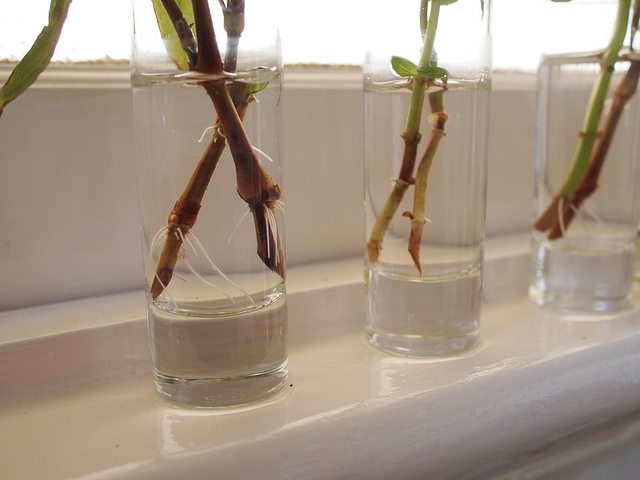
Image Credit: Alex Bayley @ Flickr

Growing new plants from cuttings is a great way to increase your stock in a relatively short time. Rooted cuttings are often sturdier than seedlings, and come to maturity faster, many of them bearing flowers and fruits much earlier than seedlings. For example, if you were to grow English Holly from seeds, it may take years to grow into a good-sized bush and bear the red berries, if at all it does. Holly is dioecious, having separate male and female plants. After years of waiting, you may end up with a male plant that bears no berries.

Plants grown from cuttings are exact clones of the parent plant, so you know exactly what you're growing, which is not the case with seed-grown plants. That's why many gardeners prefer to grow new plants from cuttings even when they can be easily grown from seeds. You can pick and choose from existing plants that have desirable characteristics such as good vigor, optimum size, disease resistance, and good yield.

Populating your garden with cuttings may work out to be very cost effective. A single plant can give you plenty of cuttings without jeopardizing its health. If you have gardening friends, you can exchange cuttings. If not, you can get just one or two plants from the gardening center and take multiple cuttings from them even before planting them out in the garden. This is the way to go if you need a large number of plants for a hedge or beds. You can even take some tip cuttings from the herb bundles you buy from the supermarket shelves.

Some plants are sterile; they do not make viable seeds. This is the case with many naturally occurring and artificially developed hybrids. Such plants can be propagated only by cuttings or some other method of vegetative reproduction such as division, layering, grafting or tissue culture.

For successful propagation, cuttings should be taken at the right time, especially for plants that change their growth pattern according to seasonal changes. There are different types of cuttings depending on the age of the stems from which they are taken.

Types Of Cuttings

Softwood cuttings – Taken in late spring or early summer (May-June) from new shoots that appeared that season. The soft, flexible, green stems should be kept moist with frequent misting. They readily take root and get established in the same season.

Semi-ripe cuttings – Taken in summer (June – August) from slightly matured stems of that season, they may take a bit longer than softwood cuttings to take root, but the warmth of the summer months helps with root growth.

Hardwood cuttings – Taken in fall and winter from mature, woody stems, they are ready for planting in next spring. Ideally, the cuttings should be prepared as soon as the shrubs start shedding leaves so that they can grow enough roots before the spring flush of shoot growth.

You can use different parts of the stem to grow new plants, but some plants can be propagated from leaf and root cuttings too.

Tip cuttings – 6-8 inches long cutting from the growing tip of the stem is taken just below a node. Most herbs can be grown from tip cuttings.

Basal cuttings – A side branch is taken, cutting it as close to the main stem. Most plants grow readily from 6-10 inches long basal cuttings.

Heel cuttings – Many shrubs require a bit of the old stem for successful rooting. The side branches are yanked off the parent plant so that they contain a part of the main stem (heel).

Stem sections – Many cane-forming plants can be propagated by midsections of their long stems. Each 4-6 inch section containing a few nodes can sprout roots at the bottom end and new top growth from side buds. Since the sections may have the same thickness at both ends, the bottom ends should be marked as soon as you divide the stem.

Root sections – Some plants like the sumac and the Californian tree poppy are easier to grow from root cuttings than stem cuttings. A few roots can be dug up in the dormant season without harming the parent plant, and divided into several sections.

Leaf cuttings – Many succulents grow new plants from whole leaves, but snake plant and begonias can be propagated from sections of the stem.

Helping The Rooting Process

Preparing The Cuttings

The cuttings need to be stripped away from the lower leaves before sticking them in the rooting medium. For woody cuttings, the bottom end is slightly scraped to expose the cambial tissue. Cuttings of some fleshy stems should be kept aside overnight or for a few days to form a callus––a layer of dry scar tissue––at the bottom end.

Rooting medium

A good rooting medium that keeps the cut end constantly moist is necessary. Garden soil is better avoided because it contains disease causing organisms and spores that can rot the cuttings. A combination of peat moss and sand/perlite is good enough for holding enough moisture while allowing good drainage. Do not add any fertilizer to the mix.

Regular misting and watering

The cuttings should not be allowed to wilt. Keep on misting the top portion and water the medium regularly, but ensure drainage. Covering the pot/propagation tray with plastic helps provide a warm, humid atmosphere ideal for growth.

Most cuttings can actually take root in water, but water-grown roots are relatively fragile, so extra care should be taken while transplanting them into soil.

Providing warmth

Heating pads may be used to provide bottom heat. It encourages root growth.

Rooting hormones

Hormones can be used to ensure greater success with rooting, but are only necessary with some plants that are difficult to root. An infusion of willow branches can help with rooting. The medium should not contain fertilizers when rooting hormones are used.

The Best Plants To Grow From Cuttings

Image Credit: Mannewaar @ Flickr

Although it doesn't hurt to experiment with growing any plant or herb from cuttings, many annuals that grow readily from seeds may not be worth the effort. The cuttings of some plants, particularly fruit trees that are grafted onto rootstocks, will not grow well even if you manage to force out some roots with the help of rooting hormones. But the following plants give excellent results.

1. Sage – Take 4-inch semi-ripe basal cuttings in fall and pot up. Keep the rooting medium warm and moist throughout winter and then transplant in spring.

2. Thyme – Grow several varieties of thyme from tip cuttings taken in summer and inserted into some moist potting medium.

3. Basil – They are easily grown from seeds, but add to the variety by rooting up tip cuttings taken at any time of the year and kept in a warm, protected place out of direct sun.

4. Rosemary – Take 3-5 –inches long tip cuttings in spring from new growth, or use heel or basal cuttings in fall for rooting in cold frame. If you don't want a lot of rosemary plants, root a few cuttings directly in individual pots covered with a plastic dome.

5. Lavender – Take 3-inch tip cuttings in early spring and root them in a cold frame. Transplant the rooted plants into garden beds after 4-6 weeks. In summer and fall, heeled cuttings can be taken for spring planting the following year.

6. Horseradish – Lift the root in early spring and cut into 3-inch sections. Plant them a foot apart directly in the garden bed.

7. Comfrey – Dig up a plant and take root cuttings in either spring or fall. Directly plant in a deeply worked bed and cover with mulch. Its roots grow deep into the soil and bring up the nutrients.

8. African violets – Cut off young, healthy leaves with 2-3 inches of leafy stalk. After poking a hole with a chopstick at a 70-degree angle, insert the stalk of each leaf into a tray of moist compost and sand. Keep the tray moist and warm and in brightly lit area.

9. Rex Begonia – All you need to grow these big-leaved beauties is a single leaf. Make a few slashes on the prominent veins on the underside of the leaf and lay it on a moist bed of peat moss and sharp sand in equal proportions. Weight the leaf down with a few pebbles so that the cut edges remain in contact with the bed. Keep in a warm, well-lit place and watch the new plants appearing at these cut edges.

10. Snake plant (Sansevieria) – 2-3 inch sections of the leaf can be used to make new plants. You can thus make a large number of plants from one parent plant. The only problem with this method of propagation is that the new plants will not carry the original variegation. Sections of rhizomes should be planted to retain the variegation.

11. Aluminum plant (Pilea cadierei) – Take tip cuttings with 3-4 nodes. Strip the lowest pair of leaves and trim the stem at that node. Insert into moist rooting medium and keep in a warm place. Keep the medium moist at all times until new growth appears.

12. Coleus – Growing tips, as well as side shoots, arising from the axils of leaves on this plant, will result in new plants. Water the plants very well before snipping off growing tips with 2-4 nodes. Remove the lower leaves and stick into some moist rooting medium. You can insert the cuttings into bottles of plain water, but water-grown plants need extra care while transplanting.

13. Geranium – 6-8 inches long cuttings can be rooted, but it helps if the parent plant is allowed to wilt slightly prior to taking the cuttings. Withdraw water for a week and then take the cuttings 12 hours after watering the plant. The rehydrated stems take root more easily.

14. Philodendrons – You can find a large variety of philodendrons with attractive leaf patterns and colors, but the good news is that all of them are easy to grow from cuttings. Tip cuttings with 2-3 nodes are the easiest to root because they start growing from the tip as soon as the roots form, sometimes even earlier. Mid sections with 2-3 nodes are also good, but it may take some time for new shoots to develop from leaf axils.

15. Jade plant (Crassula) – These fleshy-leaved plants are great for gifting. If you have one plant, you can make several with stem cuttings taken almost any time of the year, as in the case of most houseplants that are tropical in origin. Take 3-4 inch long cuttings with a sharp blade and keep them aside for a week. A good callus formation protects the fleshy stems from rot. Insert the cuttings in a well-draining potting mixture used for succulents. Water occasionally, allowing the potting mix to become nearly dry in between.

16. Chinese evergreen (Aglaonema spp.) – When these plants become leggy, take tip cuttings and pot them up in moist compost and sand potting mix. Keep the soil evenly moist, not wet. Mist the leaves to keep them hydrated until new roots can supply water. Make 3-inch long sections of the remaining stem and lay them horizontally into a tray of moist peat-sand mix. Partially cover the sections with sand and enclose the tray in clear plastic until new shoots start to push through the plastic. Pot up the new plants in individual pots.

17. Dumb cane (Dieffenbachia spp.)  – The plants keep losing lower leaves as they grow. Cut off the leafy heads and set them aside for a day or two to form a callus. Pot up in individual containers and keep in a warm place that gets good light. Cut off the remaining bare canes 2 inches above the soil line. Divide these canes into 3-inch sections and place in rooting trays containing peat and compost. Keep covered until shoots come up. Keep the original plant in a warm, well-lit area; it will put up new growth in no time.

18. Ti plant (Cordyline spp.) – These cane-forming plants will eventually grow too tall and lanky. Whenever you feel like pruning your Ti plant, make new plants with the cut branches. Take 1 to 1 ½ ft long growing tips and trim off the lower leaves. Insert into potting mixture in individual pots and keep them in a warm place near a bright window. If any part of the cane is left over, cut it into sections 8-10 inches long. Mark the bottom end of each section by giving it a slanted cut. Insert into a bed of moist soil in the garden.

19. Fragrant Corn plant (Dracaena fragrans) – This one is closely related to Ti-plant, so the propagation method is similar. Tip cuttings and mid-section cuttings can be grown into new plants.

20. Fuchsia – One can never have enough of these beauties; luckily they are very easy to grow from cuttings taken in spring. Tip cuttings with 3 pairs of leaves can be inserted into a moist compost-sand mix and kept covered with plastic to provide humidity and warmth. Plant them out in summer to get flowers in the same season.

21. Hydrangea – Take 4-inch long tip cuttings carrying 3-4 pairs of leaves. Remove the lowest pair and trim the stem closer to the node. Insert into moist rooting medium and cover with plastic sheet. You can trim the larger leaves by 3/4th to reduce water loss through evaporation.

22. Holly – In fall, take 10-12 inch cuttings from a female (one that has borne berries before) bush and wound the bottom one inch. Dip in rooting hormone powder and pot up in some moist rooting medium. Cover with plastic sheeting and keep indoors.

23. Californian tree poppy (Romneya sp.) – Dig up some roots in winter (December) and cut them into 3-inch sections. Lay them horizontally on a tray of moist sand-compost mix. Cover with a glass until shoots appear. Wait until summer to plant them outside.

24. Rose – Take 12-inch long hardwood cuttings of pencil thickness in fall and plant out in the chosen location. Water the cuttings thoroughly until winter.

25. Weigela – Take 5-inch long softwood/semi-ripe cuttings in late spring or early summer and pot up, keeping under a plastic cover. Plant out in early fall. Alternatively, take hardwood cuttings in fall. Root them and overwinter them in a cold frame, until they can be planted outside next spring.

Happy cutting!

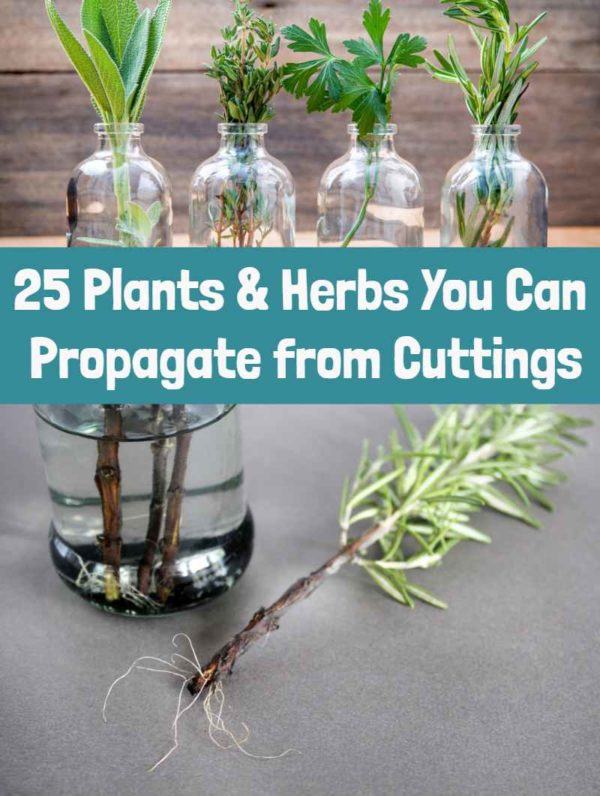
Pin This To Save For Later

25 Plants & Herbs You Can Propagate From Cuttings

Read Next: 10 Perennial Herbs You Can Plant Once & Enjoy For Years


~A.

Friday, September 13, 2019

54 Things You Can Declutter from Your Home | Apartment Therapy

54 Things You Can Declutter from Your Home | Apartment Therapy

54 Things Absolutely Nobody Should be Storing, Anywhere

Have you ever had guests over and then for some reason needed to move a piece of furniture, like the ottoman or an armchair? You hope nobody notices the crumbs and missing LEGO bricks, but still blow your own cover by apologizing for the mess. It's the housekeeping equivalent of getting caught with your pants down.

If someone were to poke through your storage areas and see all the things you're needlessly keeping, the feeling would probably be the same: Suddenly aware and feeling awkward about things you very easily could have handled, but haven't.

Here is a big list of things that none of us has any business keeping:

Declutter with the September Sweep!

Join our free 15-day decluttering class and enjoy a more efficient, more organized, and more streamlined space.

  1. The fondue set from your wedding registry that you haven't used once in your 12 years of marriage.
  2. A stack of retired sheets you tell yourself you're going to use as drop cloths for when you paint, but you still just buy the drop cloths every time.
  3. Your old cell phones.
  4. The Beanie Babies you're hoarding in case they become valuable one day.
  5. Pillows you've retired from the beds that you keep in case you have some giant slumber party that never happens. (You don't even like to share a room on vacation!)
  6. Baby clothes you wore 35 years ago that your mother saved for you. (Thanks, Mom, but they've got to go.)
  7. Expensive jeans you haven't fit into since 2011.
  8. Costume jewelry you like so little that you'd let your toddler play dress-up with it if it weren't a choking hazard.
  9. Cookbooks you haven't cracked since you were inspired to go vegan six years ago.
  10. That refillable popcorn bucket you swear you're actually going to remember to bring to Disney next time you go.
  11. Takeout menus from restaurants whose dishes you know by heart by now. (And, you know, they're online.)
  12. Coupons you will actually never remember to pull out before they expire.
  13. Magazines you're keeping in the unlikely event you get struck by the urge to make rolled paper baskets.
  14. Clothes from 15 years ago, because you know if you hang onto them long enough they'll come back in style again. But also, you remember the trend when it happened the first time, so the resurgence is just going to make you cringe.
  15. The boots that sit on the top shelf in your closet because you loved them so much when you got them in school… like 20 years ago.
  16. Printed photo outtakes and duplicates.
  17. Stuffed animals that your children used to love but haven't asked for in over six months.
  18. Chipped mugs that are "otherwise perfectly fine."
  19. Holiday decorations that make you groan every single winter when you see them in the bin.
  20. Full tubes of old, old lotion.
  21. Candles whose smell you don't like. Burning those would be the opposite of relaxing.
  22. Extra vases. All the extra vases.
  23. The cabinet full of washed-out, empty jars you never, ever use.
  24. Orphan socks that have been in the orphaned sock basket for two years.
  25. Retired cameras with obsolete mega pixel counts.
  26. Decorative olive oil bottles your friend brought from Italy a decade ago.
  27. Dregs of perfume you no longer wear. It's not going to smell any prettier.
  28. French fried onions from Thanksgiving three years ago. The "best by" date is long gone and you know you're going to buy another container this year anyway.
  29. Yellowed white extra power cords. They're so old they're a fire hazard.
  30. Curtain rods. If you add more windows to your house, you can probably spring for another set of curtain rods.
  31. Extra lamp shades. Any new lamps will almost certainly not fit or match them anyway.
  32. Cassette mix tapes. Do you even have a player? Take a pic and toss. (Maybe keep one for posterity. )
  33. Those extra water bottles you're keeping around for that hypothetical spontaneous hike you take when you have 15 guests over (and none of them have their own water bottles).
  34. Duck sauce packages. You have a surplus problem.
  35. The extra napkins you snagged when you picked up your to-go order. The only place those belong is the glove box of the car.
  36. Old chemical cleaners you wouldn't touch with a 10-foot pole but hang onto anyway.
  37. Cleaning toothbrushes in excess of one per sink.
  38. The old t-shirt stash you kept for cleaning but never, ever reach for.
  39. Themed party decorations. No, you will not use them for the next kid in four years.
  40. Holey socks you kept for cleaning the blinds. Do yourself a favor and use a duster like this one.
  41. Your old soccer sliders. (Unless your kid fits them by now.)
  42. Swimsuits you wouldn't feel awesome wearing.
  43. Archaic kitchen tools you never use and only keep because they were passed down by your relatives.
  44. Old, dented, or cracked helmets. They're not safe.
  45. Baby items that have been recalled.
  46. Baby items if your youngest kid is over five. Yes, you're the closest you've ever been to having that hypothetical last baby, but are you having that hypothetical last baby?
  47. Books you don't even remember reading and aren't TBRs.
  48. VHS tapes.
  49. Incandescent light bulbs.
  50. Accessories for vacuums you no longer own.
  51. That tangle of extra cords and chargers for devices you've replaced.
  52. Table linens you'd never use again. It's okay to realize your taste has changed drastically since you bought that autumnal table runner as a newlywed.
  53. The bags of seashells you've been saving for seven years for an unspecified craft.
  54. Boxes you've been hoarding just in case you need to mail things. You have three more Prime boxes headed your way next week alone. You'll be fine.

Honestly the list goes on. You might not relate to everything on the list, but it probably inspired a few similar thoughts. The idea is to be open and honest with yourself about what you need to hang on to.

Avoid casting things off to a landfill, if you're able. Many of these things can be resold locally or donated to another home.

Published: May 9, 2019


~A.